Why Does Eclipse Ask Me to Install Again and Again
Bones Eclipse User Guide.
Thanks to Don Slater at CMU for letting me use this page.
Important. Download and install Coffee first per these instructions and then download and install the Eclipse IDE per these instructions.
Eclipse is a free open-source Java surroundings available from www.eclipse.org. Eclipse is a Coffee program, but it uses a custom user interface toolkit that does non run on all platforms that supports Coffee ii. Check the spider web site for supported platforms. Eclipse requires a Coffee ii runtime, and so you need to install the Java two JDK first before installing Eclipse. You lot can download the JAVA JDK from this web page. For this grade, you lot volition want the J2SE viii.x
Contents:
- Starting Eclipse
- Setting the Eclipse Compiler to Coffee 1.vii
- Enabling assertions
- Loading an Existing Plan
- Starting a New Program
- Adding Existing Classes and Files to a Projection
- Saving (exporting) a projection in a different location for subsequently use
- Loading (importing) an entire project
- Finding Errors
- Running A Program
- Running Applets
- Generating Javadoc comments
- Debugging: Tracing Through a Program
- Debugging: Watching Values
- Debugging: Setting Breakpoints
- Debugging: Stopping the Debugger
- Displaying Line Numbers
- Creating a aught file via eclipse. (divide page)
Other sources: There are lots of good resources on the spider web for Eclipse. Hither are a few adept ones.
- Complimentary Tutorial Videos for Java and Eclipse. Eclipse and Java for Full Beginners. Here is a straight link to the first video.
- More than videos from the same source on Using the Eclipse Workbench. Hither is a direct link to the first video.
- More videos from the same source on Debugging in Eclipse. Hither is a straight link to the kickoff video.
Starting Eclipse
When yous beginning Eclipse, a startup screen appears, and the program spends some time loading various modules.

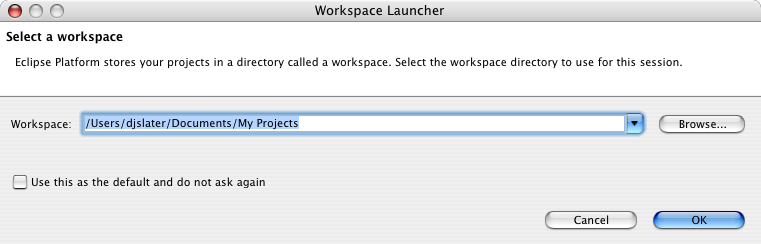
Eclipse will ask yous for your workspace (where on your figurer the projects you are working on will be stored.) The prompt will look like the following: Click on the Browse... button to navigate to the directory of your selection if it is not already selected or in the driblet-downwardly bill of fare...
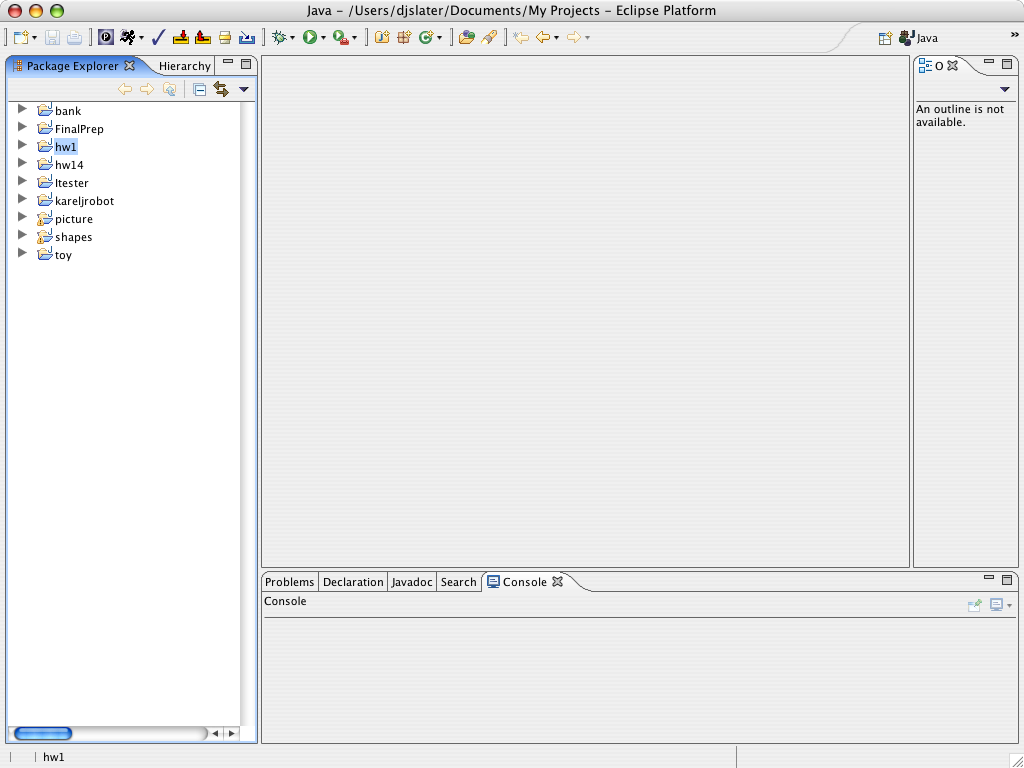
When Eclipse has finished loading, you see a screen similar to the following:
Setting Eclipse to Java 1.eight (or later) Compiler
To ensure Eclipse understands the Coffee one.8 features we will be using this term you need to set the compiler.
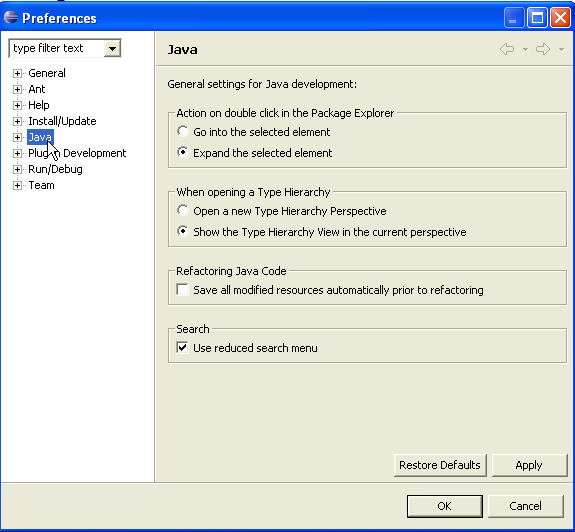
In the Eclipse main menu click on Window->Preferences... The preference window pops upwards. Select the Java category and expand it.
Click on the Compiler category to get the following window.
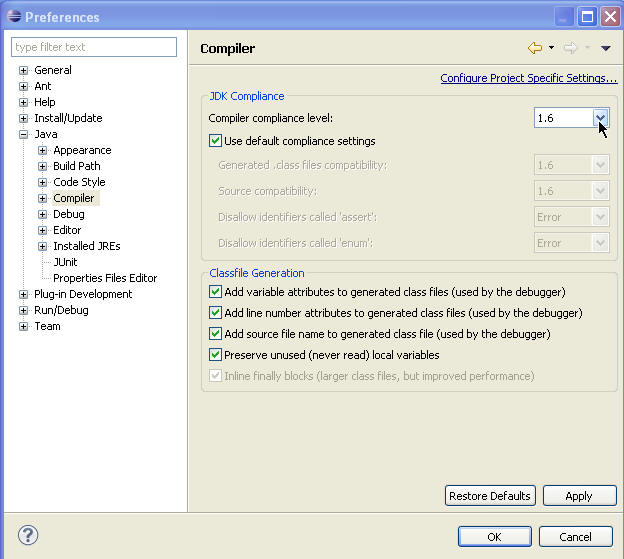
Fix the Compiler compliance level to 1.eight from the pull down menu and then click okay.
Enabling Assertions on all your projects.
Assertions are statements in a plan to about what the programmer believes to exist truthful at a requite point in execution. Assertions help to uncover logic errors. Assertions can be turned on and off. When off assertions are ignored by the compiler which doesn't do us much good during development. In this class assertions should always be on. To enable assertions follow these steps:
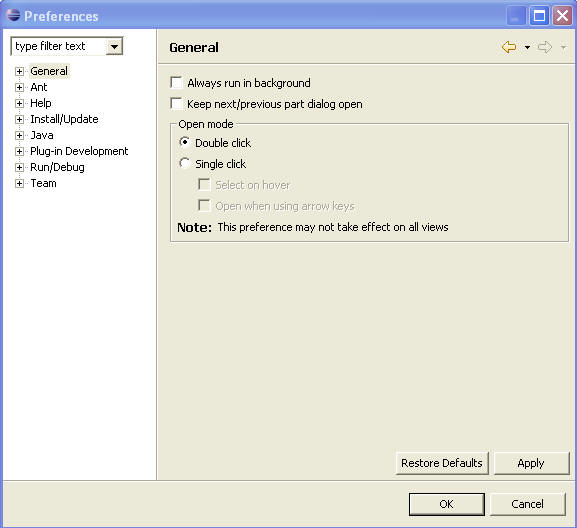
Select Window -> Preferences.
The following window volition appear.
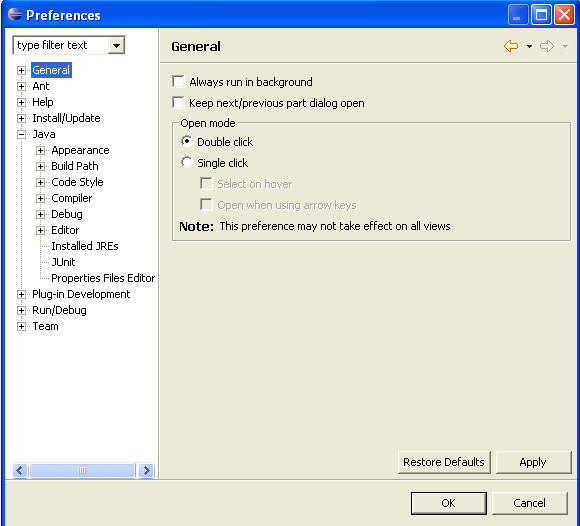
Select and expand the Java pick.
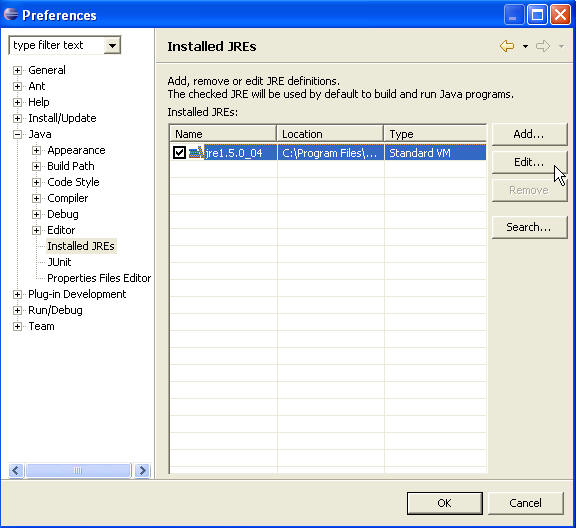
Select the Installed JREs selection.
I JRE should be checked. Highlight that one and click the Edit button.
Under the Default VM Arguments: field type in -ea . This is a switch to enable assertions when Eclipse compiles y'all Java lawmaking.
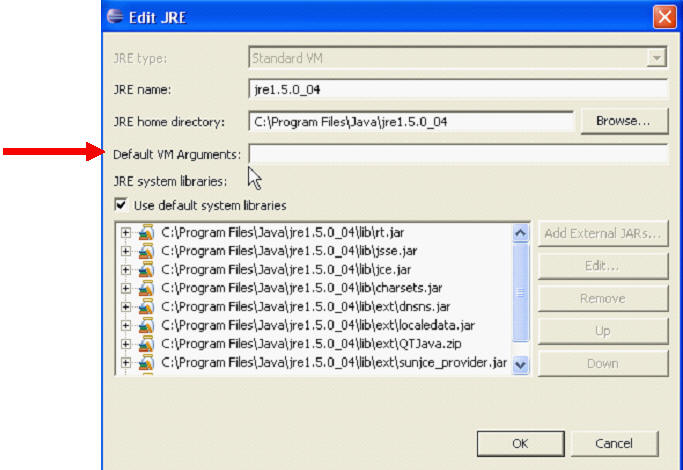
Click the OK button.
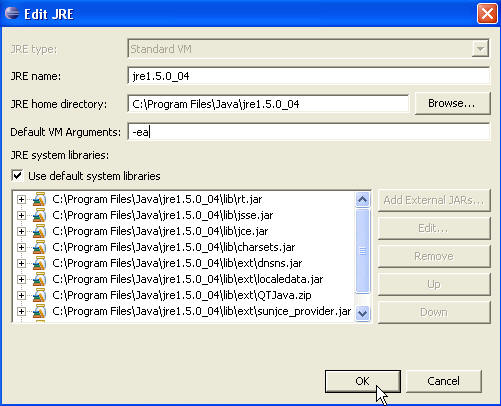
Click the OK push in the preferences window. Assertions are at present enabled and if an assertion is institute to be false a runtime error will occur.
Loading an existing program
If yous already have your plan in project workspace (see above), simply it is not in the Package Hierarchy window on the left of the screen, and then you need to make a project that contains the file(s). Follow these steps.
Select File->New->Project from the menu. You lot volition get the post-obit dialog.
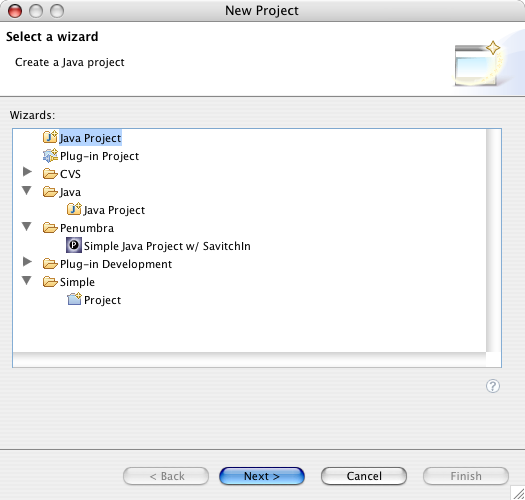
Select the Java Project option and click on the Next> button. (Practice not select the Simple selection!)
In the following dialog, give a proper name to the project, the same name every bit the directory that contains the files (watch spelling and capitalization). There should exist a message indicating The specified external location already exists. Eclipse will then attempt to import all the resources available at that location. Check Create project in workspace if it has not been selected.
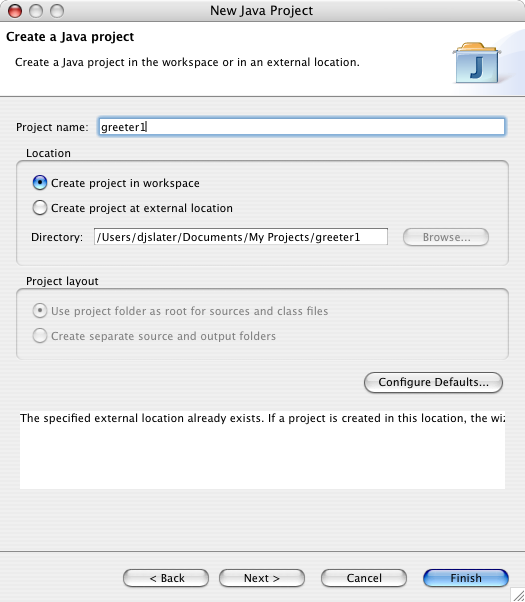
Click on the Finish button.
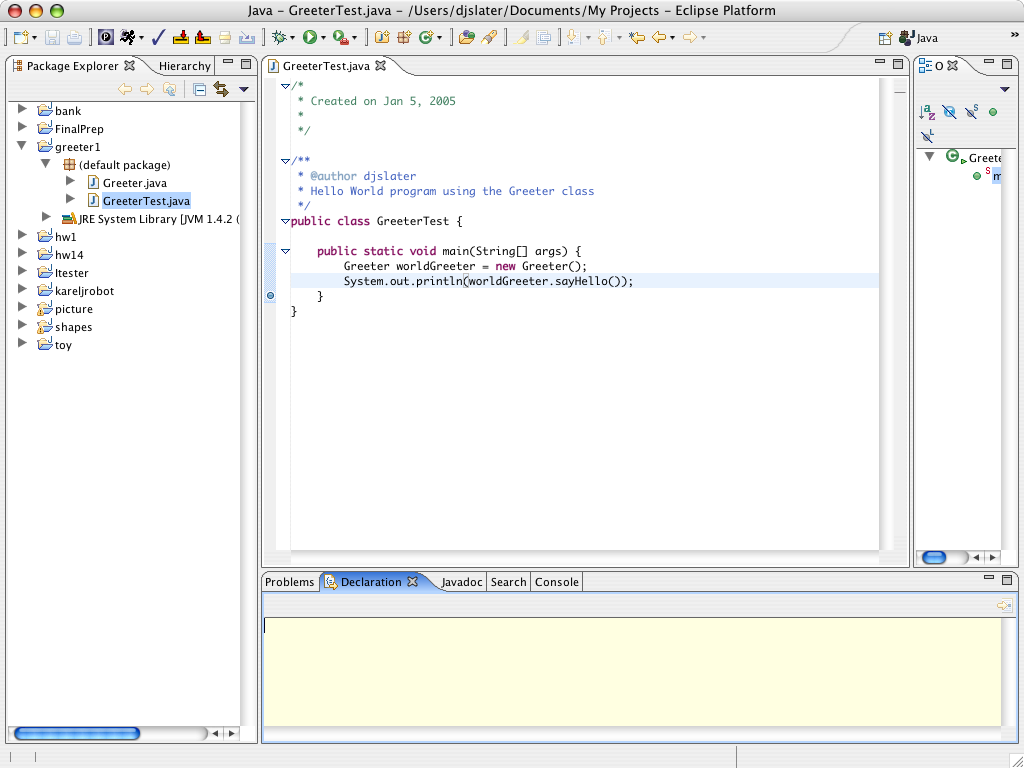
The project appears in the left hand panel. Aggrandize information technology, and also aggrandize the default bundle icon. Double-click on ane of the file names. The file is displayed in an edit window:
Starting a new plan
If you write a plan from scratch, and so y'all can start your piece of work in Eclipse. It is e'er all-time to place each of your programs into a split up directory. Eclipse will create the directory for you.
Select the Java option and click on the Next> push button. (Do not select the Unproblematic option!)
In the post-obit dialog, give a name to the projection. Take the default choices, Create projection in workspace and Apply projection folder equally root for sources and class files 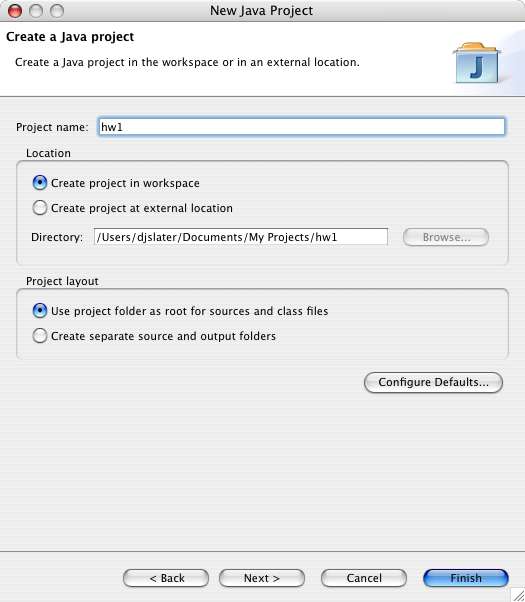
.
The New Course dialog appears.
Supply the proper noun of the grade. If you lot want a principal method for this course, check the box public static void main(String[] args) .
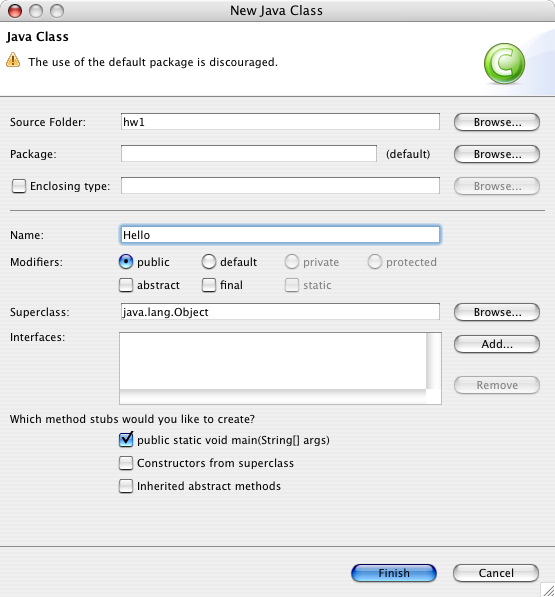
Click on the End push button.
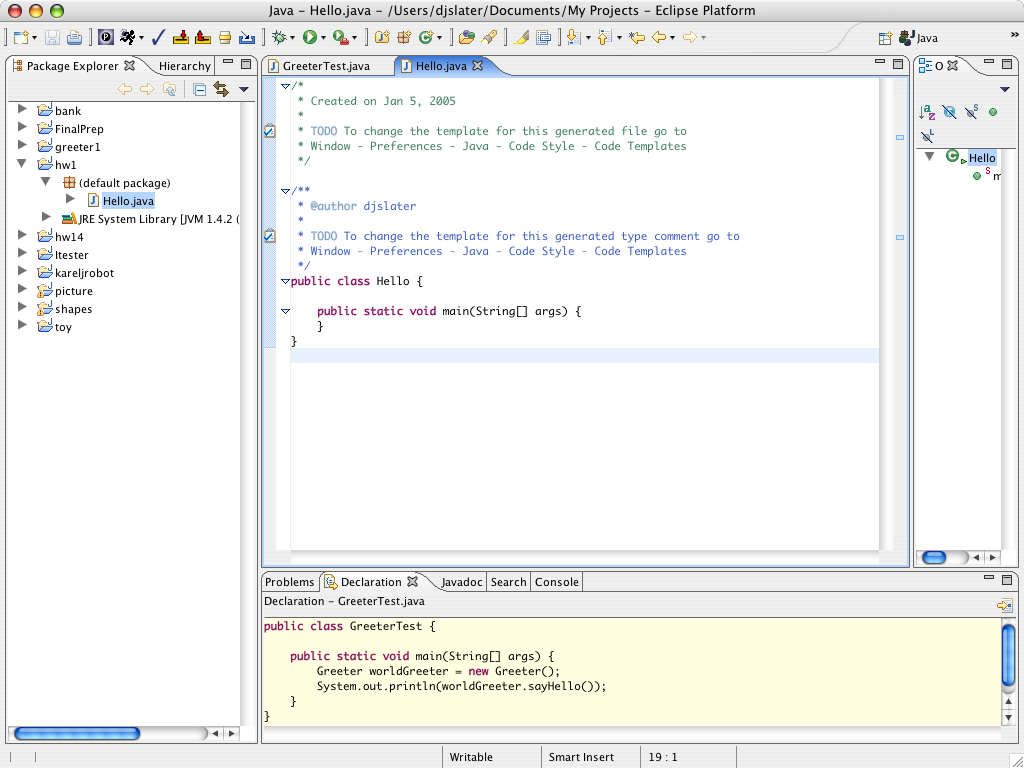
Finally, you get an editor window into which you can type your programme.
As you type in your plan, occasionally select File->Save from the carte du jour to save your work.
You may also want to experiment with some of the other convenience features of Eclipse, such as Source->Generate getter and setter .
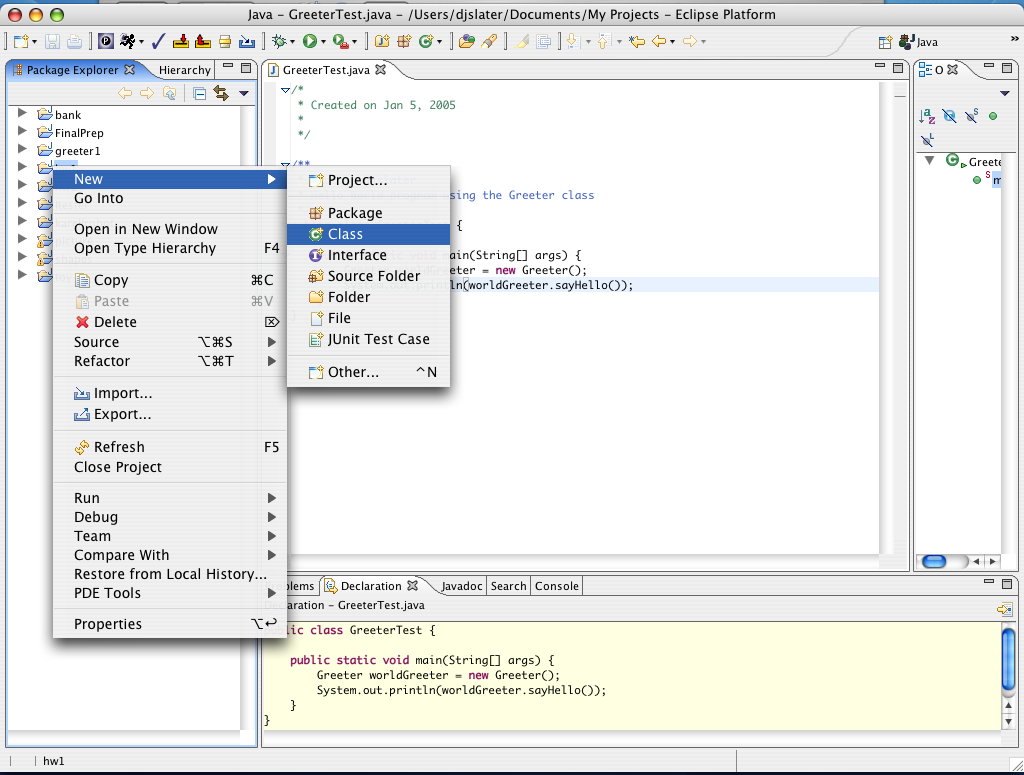
Adding Existing Classes to A Projection
You will ofttimes have to add preexisting classes to a projection when doing assignments. Assume you accept already created a project for an assignment. [Come across starting a new program above.] Download the source lawmaking files from the class web site to your figurer. This example assume you lot have downloaded the files for Assignment one to the desktop.
The easiest thing to do is to just drag and drop given Java program files into the src folder of your project. Choose the "Copy File" option in the dialog.
The long mode if you are having trouble dragging and dropping files:
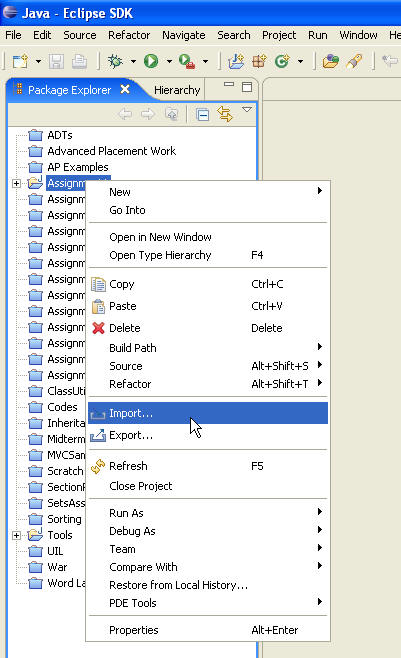
Ensure the project you want to add existing files to is open.
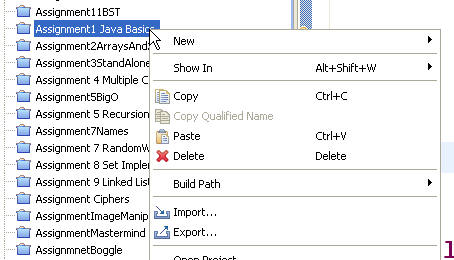
Right click on the project and select the import option from the pop upwards card.
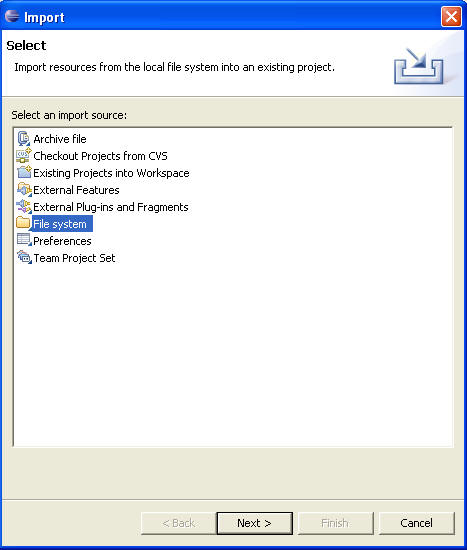
The import bill of fare pops upwards. Select the file system option.
The Import File System Window pops up. Click the browse button and navigate to the binder that has the files you want to import.
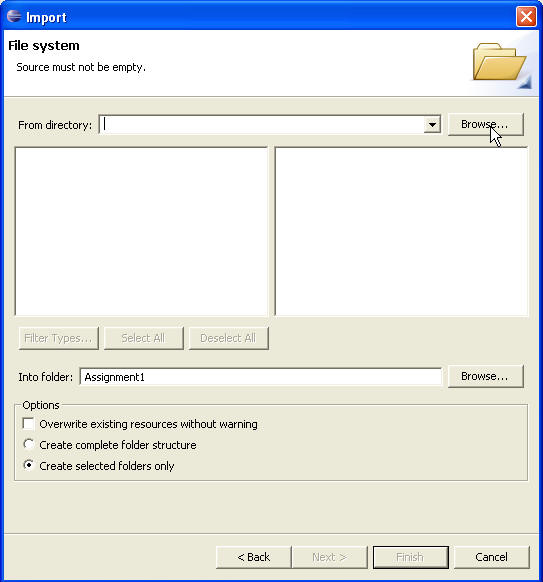
In this instance it was the desktop. After selecting the directory that has the files click okay. The files in that directory are now displayed on the left hand side of the window.
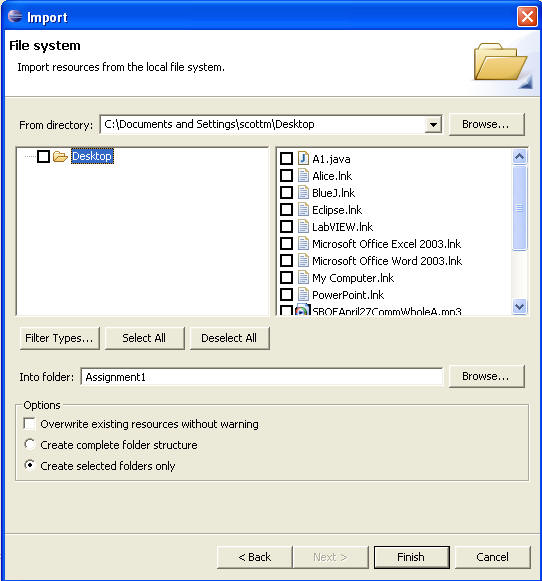
Check the boxes of the files yous want to import then click finish.
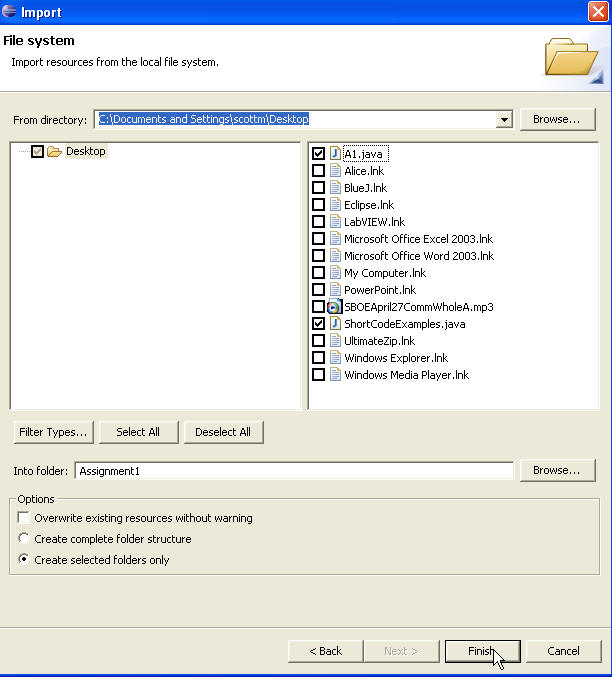
The files selected have been copied into your project. Important! This copies the files into your project directory. Changes to the file in Eclipse are not reflected in the original files. When you turn in a file ensure information technology is the right 1!
Saving (exporting) a projection in a different location for subsequently use.
If you work in the lab you will want to relieve your work to a retention stick. When yous logout of the lab computers all your work is erased from the auto.
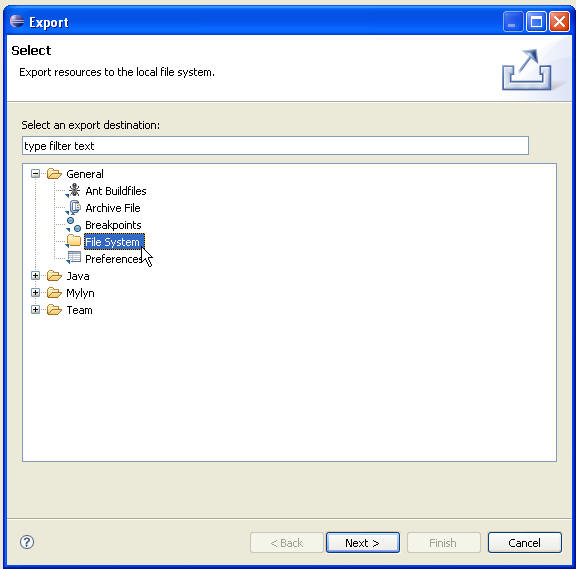
To export an entire project correct click on the projection and select consign.
In the pop up window that appears expand General, select File System, and and then press the Adjacent > button.
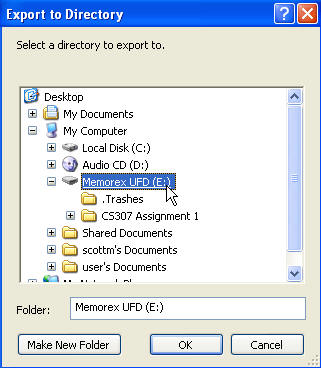
In the next window ensure your project is selected and so press the Browse button and browse to the location you want to salve the project to, most probable a memory stick.
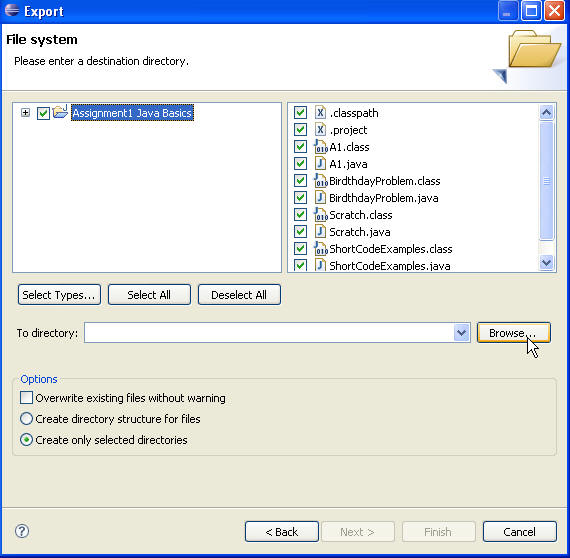
Click the OK button one time you have the location you lot want.
Click the Finish button and the project will be saved.
Loading (importing) an entire project
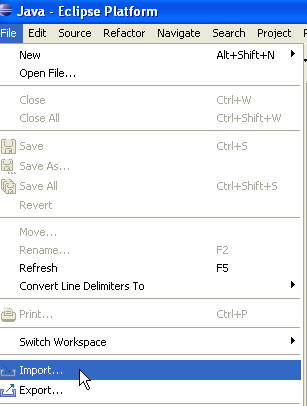
When you go back to piece of work on a project in the lab you can load a projection from a retentiveness stick.
Start Eclipse. Select File and and so Import.
From the pop up window expand the General option, select Existing Projects into Workspace and click the Next > push.
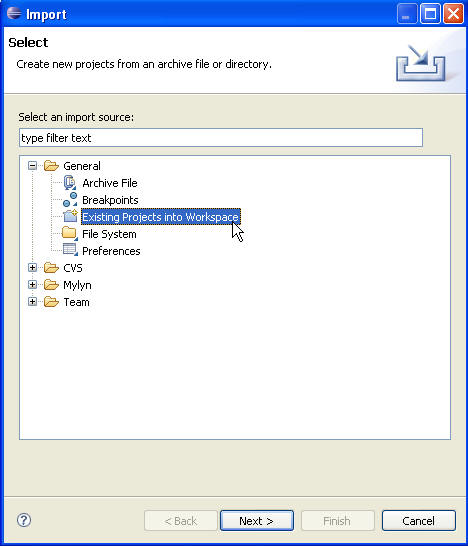
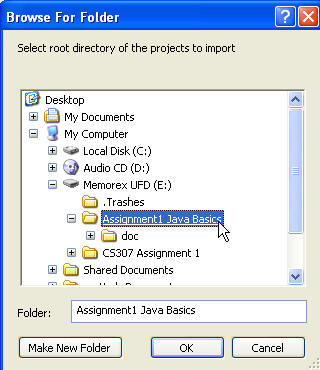
In the next window select the Browse push button and browse to the location of the project.
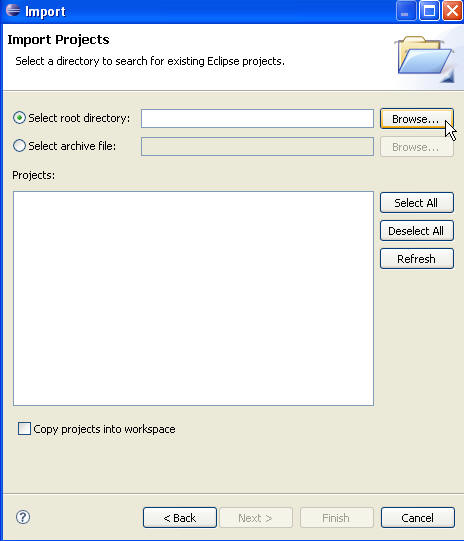
Find the project, select it, so press the OK button.
Click the Finish button and the project will be loaded into the Eclipse workspace. Be certain to export the project when you lot are done to save your changes.
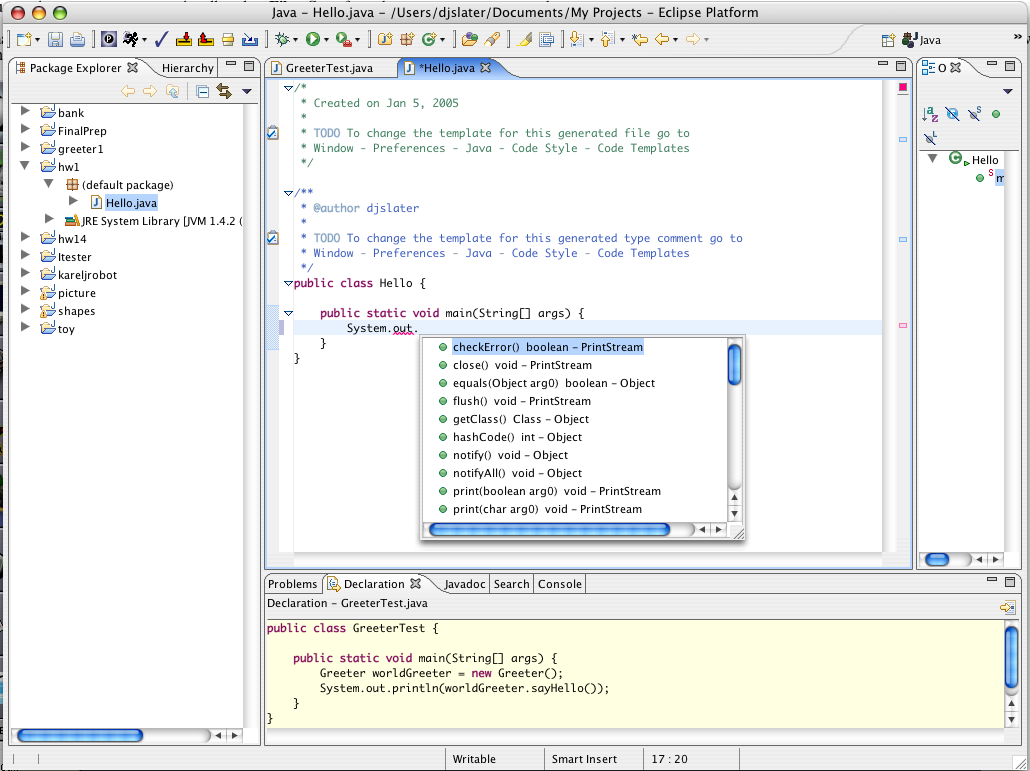
Finding Errors
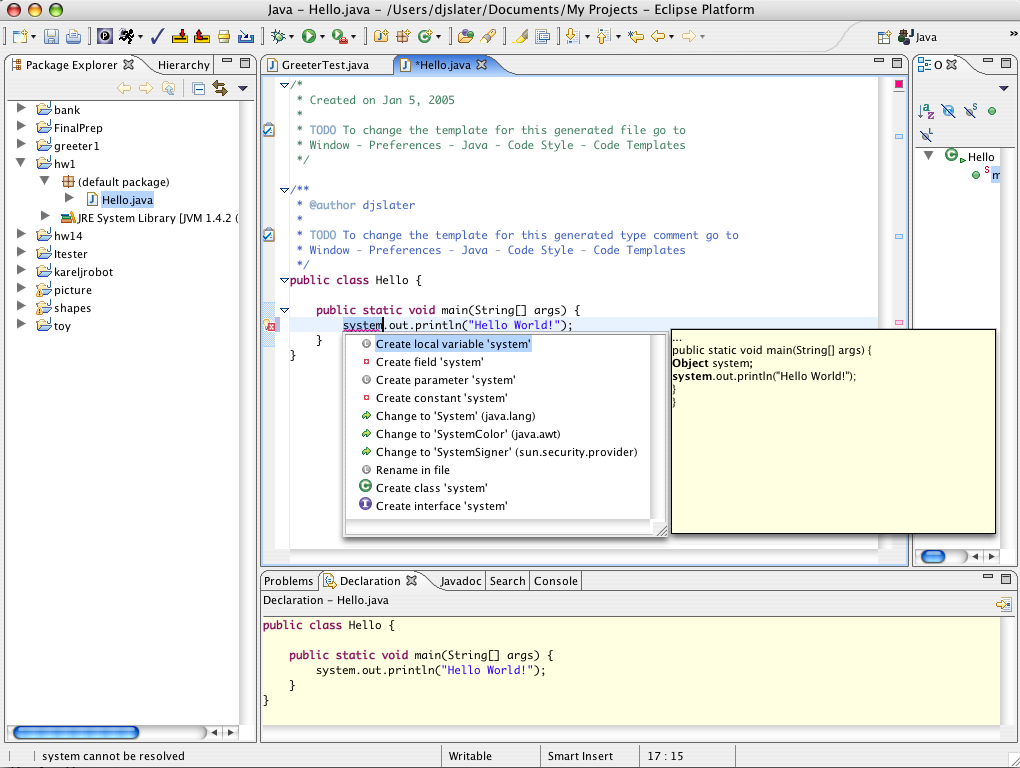
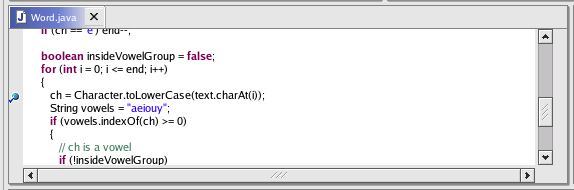
Even before compiling a plan in Eclipse, the Editor can display problems in your program. (Run into the cherry-red Ten in the leftmost column in the editor window below.)
Past double-clicking on the red 10, a description of the trouble and some helpful options are displayed. In this example, you would click on Alter to 'System' (coffee.lang)
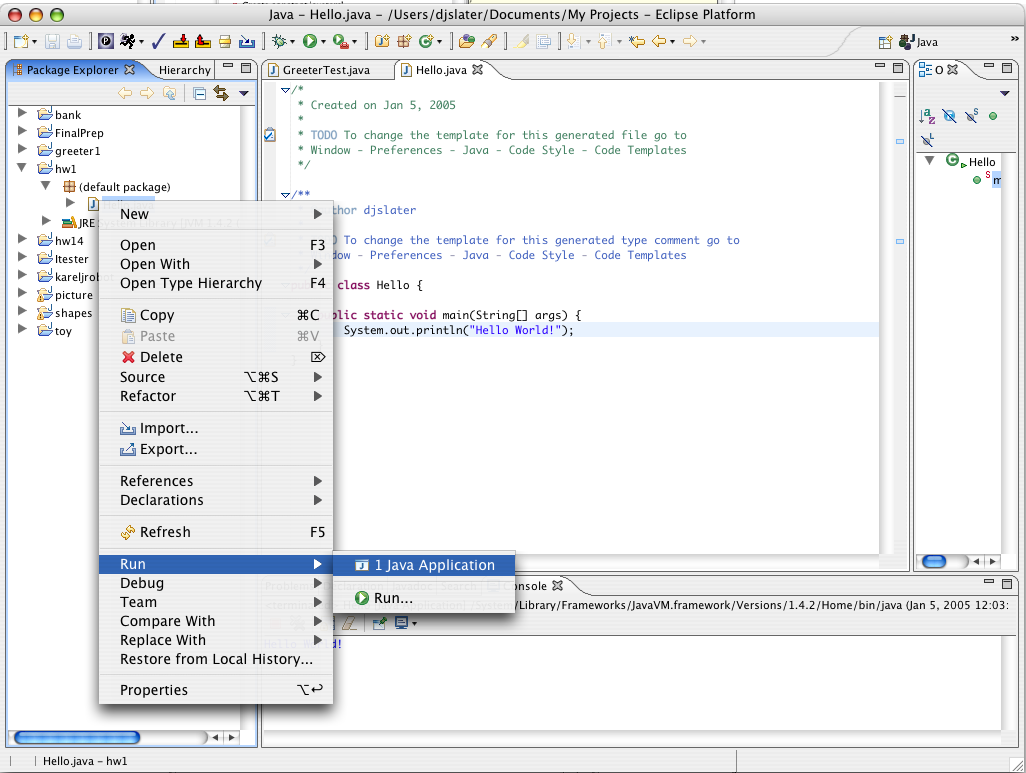
Running a program
To run a program, right-click (Windows) or control-click (Macintosh) on the file with the main method, and from the context menu select the Run->Java Application carte du jour selection. The program runs. Any console output is directed to a window at the bottom of the screen.
Running applets
To run an applet, make sure the current projection is still selected in the leftmost pane. Then select the carte selection Run->Java Applet. Eclipse will launch the applet viewer on the subclass of Applet that it finds in your project.
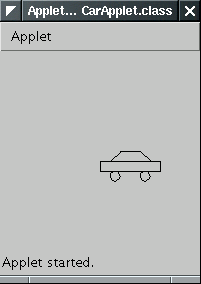
The applet viewer is started with a default size which is rather pocket-size. Simply resize the applet window.
Close the window to terminate the applet.
Generating Javadoc comments
Select Project -> Generate Javadoc from the menu. You will go a dialog such as the following i:
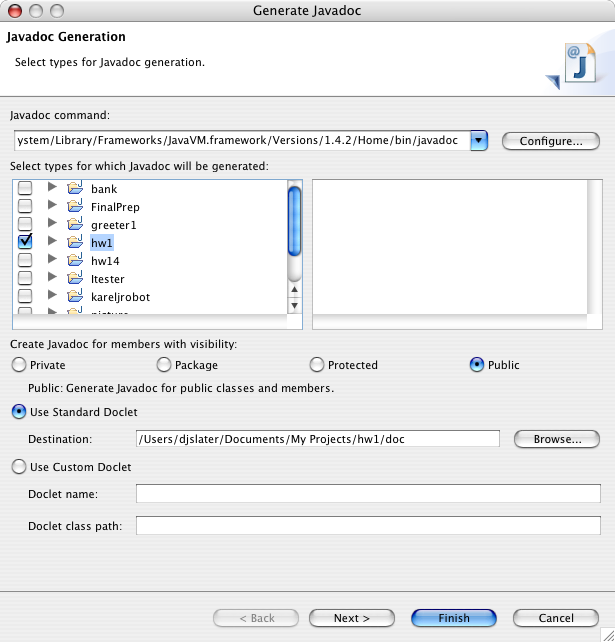
Click the cleckbox for the projection that you desire to document. And then brand sure that the destination directory is correct. Click on Finish.
Tracing through a program.
Before debugging a program, you lot should fix a breakpoint at the start of the master method.
Double-click on the gray bar to the left of the edit window, next to the first source line subsequently the line public static void main(String[] args). A blue dot appears, indicating the breakpoint.
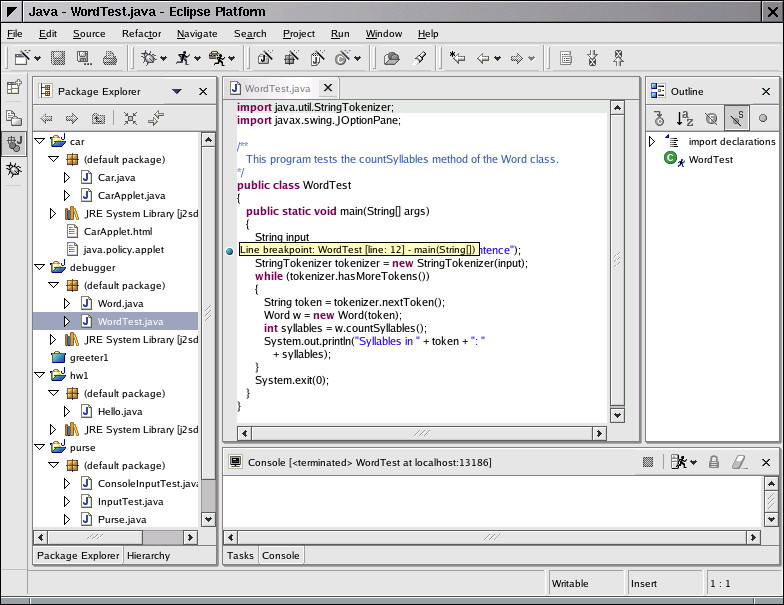
Then select the menu option Run->Debug as...->Java Awarding. The debugger starts and switches the Eclipse brandish to the debugger perspective. It pauses at the breakpoint that you ready.
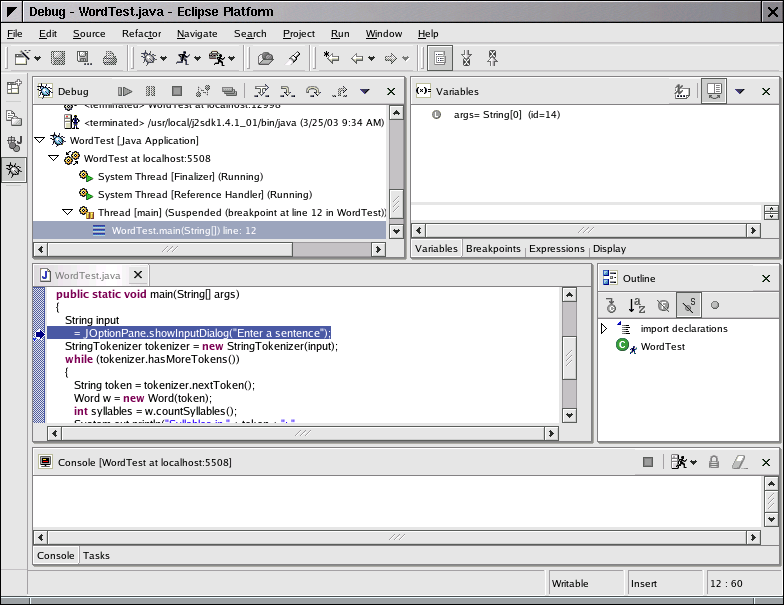
Whenever you select the menu pick Run->Step Over (or the F6 keyboard shortcut), and so the debugger executes one line of the program, without stepping inside method calls. For example, tracing over the call
Discussion w = new Word(token);
will non trace inside the Discussion constructor but simply run the program to the next line of the master method.
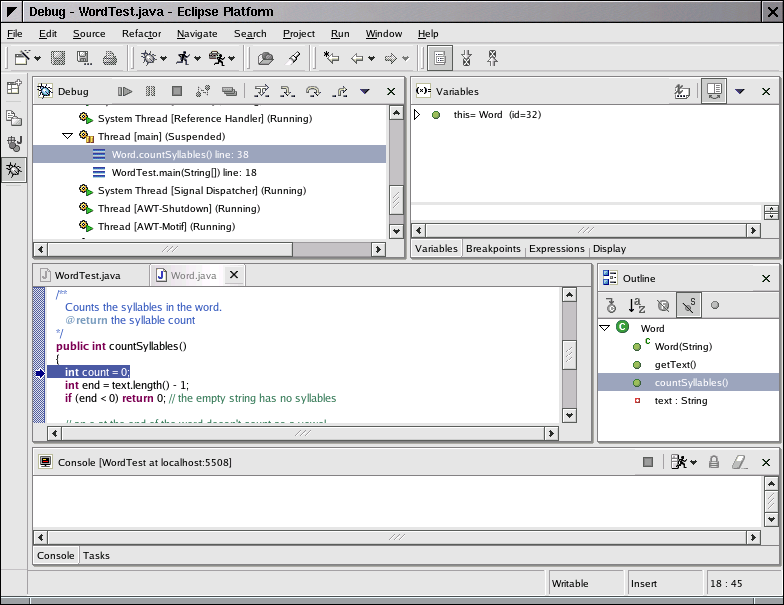
Contrast that with the menu selection Run->Step Into(or the F5 keyboard shortcut). This command traces inside method calls. For example, tracing into the line
int syllables = w.countSyllables();
stops at the first line of the countSyllables method:
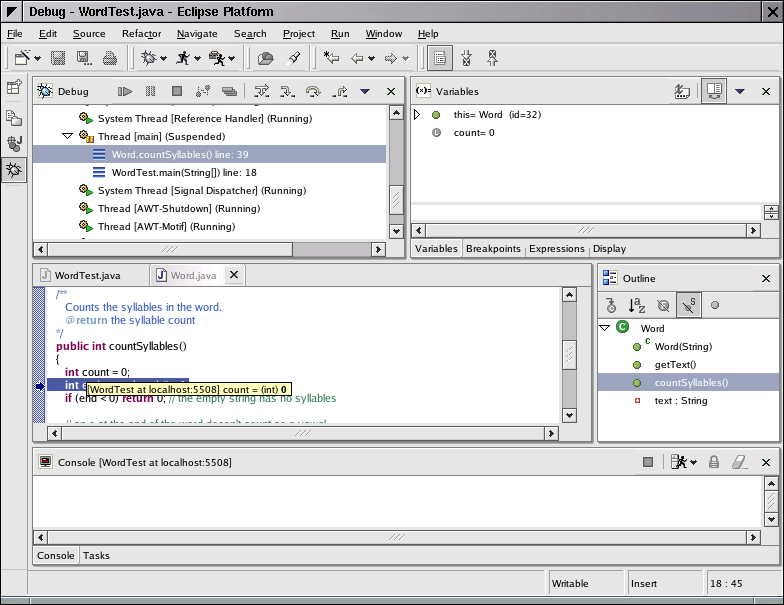
Watching values
To see the value of a variable of a simple type (such as a number or a cord), but hold the mouse pointer over the variable name when the debugger is stopped. Then the contents of the variable is displayed in a pocket-sized rectangle side by side to the variable proper name. For case, hither is the contents of the count variable in the countSyllables method.
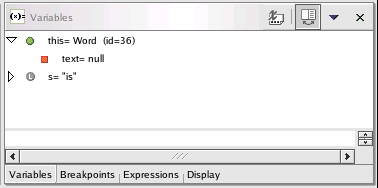
The top right window shows all local variables. Click on the triangles to look inside objects. To see the case fields of the implicit parameter, look inside this.
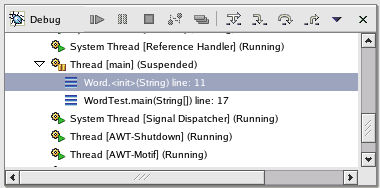
The top left window shows the call stack (with the near recently called method on peak). For example, the following phone call stack shows that the WordTest.primary method called the Word.<init> method, that is, the constructor.
Setting breakpoints
Tracing through a plan can be tiresome. Often, you lot desire the program to run at total speed until a particular line of code is encountered. To set up a breakpoint at a line, double-click on the gray bar to the left. A blue dot indicates the breakpoint.
Now select the menu option Run->Resume or hitting the F8 keyboard shortcut. The program runs to the side by side breakpoint, stopping simply for user input.
You can set as many breakpoints as you similar.
To remove a breakpoint, double-click on it with the mouse.
Stopping the debugger
When the program has completed, the debugger stops automatically. When you lot want to finish a debugging session without running the plan to the end, select the menu option Run->Terminate.
To return to the Java perspective (in which you can edit and compile your program), locate the perspectives toolbar at the left of the Eclipse frame:

Click on the push button with the "J" (above the problems button). Eclipse will remove the debugger windows and restore the edit windows.
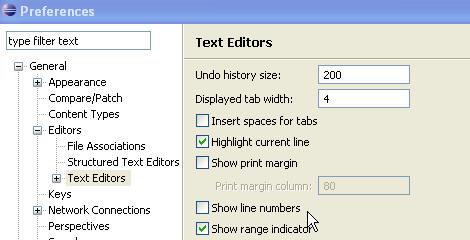
Displaying Line Numbers
To brandish line numbers in your programs select Window -> Preferences. In the popular up menu that appears expand the General menu. Under the expanded tree expand the Editors carte du jour. Under the expanded tree select Text Editors. Cheque the show line numbers box.
Source: https://www.cs.utexas.edu/~scottm/cs307/handouts/Eclipse%20Help/EclipseIntroduction.html
0 Response to "Why Does Eclipse Ask Me to Install Again and Again"
Postar um comentário